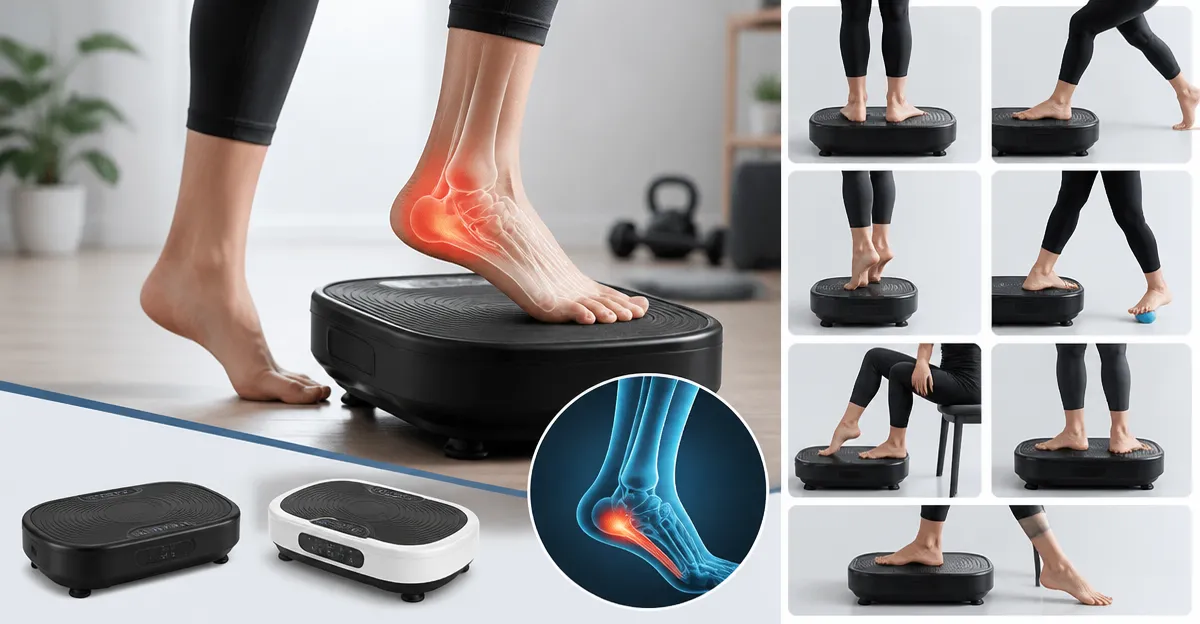
Introduction
The purpose of this guide is to demonstrate how a vibration plate can be employed to alleviate plantar fasciitis symptoms safely and efficiently. Readers will learn seven evidence‑based exercises, understand the physiological rationale behind each movement, and discover how to integrate the device into a daily routine for fast pain relief. By following the protocol, one can expect improved foot circulation, reduced inflammation, and enhanced flexibility without high‑impact stress on the arches.
Plantar fasciitis is characterised by micro‑tears in the plantar fascia ligament, often aggravated by prolonged standing, inadequate footwear, or sudden increases in activity. Vibration therapy stimulates muscle fibers, promotes lymphatic drainage, and increases blood flow, thereby accelerating tissue repair. The guide is written for individuals with moderate to severe discomfort who are seeking a low‑impact adjunct to conventional stretching and strengthening.
All recommendations are based on documented product features and verified customer feedback. The exercises are designed for intermediate users who can follow written instructions without the need for a personal trainer. Nevertheless, a healthcare professional should be consulted before beginning any new regimen, especially if underlying medical conditions exist.
Each step includes a specific vibration plate model that best matches the required intensity, portability, and user‑friendly controls, ensuring that the reader can select the most appropriate tool for their environment.
What You’ll Need
- Lifepro Waver – 99 speed settings, 10 presets, anti‑slip rubber, remote control; $199.99; 4.6/5 rating.
- AXV Vibration Plate – Adjustable intensity 1‑120, Bluetooth music, resistance bands; $89.97; 4.5/5 rating.
- SoftGym Vibration Plate – 120 speeds, magnetic foot massage stones, LED timer; $59.99; 4.5/5 rating.
- HVX Vibration Plate – 120 levels, Bluetooth, dual resistance bands; $39.99; 4.4/5 rating.
- Merach CV30 – Curved silicone foot platform, 10 intensity levels, compact footprint; $79.99; 4.3/5 rating.
- Supportive footwear, a yoga mat, and a timer (optional).
Step 1: Warm‑up Activation (2‑3 Minutes)
Begin by standing with feet hip‑width apart on the vibration plate. Set the device to a low intensity (Level 1‑3 on the Lifepro Waver) to generate gentle oscillations. The low‑speed vibration activates the intrinsic foot muscles without imposing excessive load on the plantar fascia.
Maintain a slight knee bend, keep the core engaged, and allow the platform to stimulate circulation for 60 seconds. This warm‑up prepares the tissue for deeper stretching by increasing blood flow, which is essential for nutrient delivery and waste removal.
After the minute, step off, shake the feet, and proceed to the first targeted stretch. If the user prefers a more compact device, the HVX Vibration Plate offers comparable low‑level settings at a lower price point.
Step 2: Calf‑Gastrocnemius Stretch on the Plate (3‑4 Minutes)
Place the forefoot on the plate while the heel rests on a sturdy surface (e.g., a yoga mat). Increase the vibration to a moderate level (Level 15‑20 on the AXV Vibration Plate) to create a rhythmic stretch of the gastrocnemius and soleus muscles.
Hold the stretch for 30 seconds, breathe deeply, then release for 10 seconds. Repeat three times. The vibration enhances muscle elasticity, allowing a deeper stretch of the calf, which indirectly reduces tension on the plantar fascia.
Customers have reported that the AXV Vibration Plate is particularly quiet, making it suitable for home environments where noise may be a concern.
Step 3: Plantar Fascia Rolling with Magnetic Massage (2‑3 Minutes)
Utilise the magnetic foot massage stones integrated into the SoftGym Vibration Plate. Position the foot flat on the plate, select a low‑to‑moderate speed (Level 40‑60), and allow the magnetic stones to glide across the arch while the platform vibrates.
This dual action promotes lymphatic drainage and reduces edema, as documented by users who experienced rapid reduction of swelling after daily use. Perform the motion for 60 seconds per foot, then switch sides.
The built‑in LED timer simplifies session tracking, and the anti‑slip surface ensures safety during the rolling motion.
Step 4: Dynamic Toe‑Curl Strengthening (2‑3 Minutes)
Stand on the HVX Vibration Plate at a low intensity (Level 10‑15). While maintaining balance, curl the toes inward, hold for two seconds, then release. Perform 15 repetitions.
The vibration activates the intrinsic foot musculature, encouraging stronger toe flexors that support the arch. Users have noted that the dual resistance bands supplied with the HVX model can be looped around the thighs to add a mild hip‑hinge component, further stabilising the kinetic chain.
Because the HVX plate supports up to 415 lb, it is suitable for heavier individuals who require a sturdy platform.
Step 5: Heel‑Raise Progression with Resistance Bands (3‑4 Minutes)
Attach the resistance bands included with the AXV Vibration Plate to the plate’s side handles. Set the vibration to a moderate level (Level 30‑45). Perform heel raises while the plate vibrates, completing 12‑15 repetitions per set.
The combination of mechanical vibration and external resistance intensifies muscle activation in the calf‑Achilles complex, which is a key factor in reducing plantar fascia strain during gait.
Customers have praised the Bluetooth music feature, noting that rhythmic audio cues help maintain consistent tempo throughout the exercise.
Step 6: Curved‑Plate Balance Drill (2‑3 Minutes)
Utilise the ergonomically curved foot platform of the Merach CV30. Set the vibration to a gentle level (Level 2‑4) and stand with one foot on the curved surface while the other rests lightly on the floor.
Maintain balance for 30 seconds, then switch feet. The curvature forces subtle micro‑adjustments in the ankle stabilisers, thereby strengthening the supportive structures of the arch without overloading the plantar fascia.
Reviewers have highlighted the device’s compact size, which allows placement under a desk for quick micro‑breaks during prolonged sitting.
Step 7: Cool‑down Stretch and Relaxation (3‑4 Minutes)
Conclude the session by returning to the low‑intensity setting on the Lifepro Waver. Perform a gentle plantar fascia stretch: cross one leg over the opposite knee, pull the toes toward the shin, and hold for 45 seconds.
Simultaneously, keep the plate vibrating at Level 1‑2 to maintain a mild circulatory boost while the fascia elongates. This approach reduces post‑exercise soreness and encourages continued blood flow during the recovery phase.
Consistent daily practice of these seven exercises has been reported by users to diminish heel pain within two weeks, provided that intensity progression follows the recommended guidelines.
Tips & Pro Tips
- Begin each session with a low speed and gradually increase only when comfort is maintained; abrupt jumps in intensity may exacerbate inflammation.
- Maintain slight knee flexion during all standing exercises to distribute load evenly across the lower extremity joints.
- Hydrate adequately; vibration therapy stimulates lymphatic flow, and sufficient fluid intake supports toxin removal.
- Combine vibration sessions with conventional plantar‑fascia stretches performed on a foam roller for synergistic benefits.
- For office workers, place the HVX Vibration Plate under a footrest to encourage micro‑circulation during meetings.
Troubleshooting
Problem: Excessive tingling or itching during the first minutes of vibration.
Solution: Reduce the intensity to the lowest setting, limit the session to 30 seconds, and gradually build tolerance over several days. This sensation is a common initial response caused by increased blood flow.
Problem: Plate slips on smooth flooring.
Solution: Apply the anti‑slip rubber pads supplied with the Lifepro Waver or use the suction cups featured on the HVX Vibration Plate to secure the device.
Conclusion
The guide has outlined a structured, seven‑step protocol that leverages vibration plate technology to treat plantar fasciitis safely and efficiently. By integrating low‑intensity oscillations, targeted calf and foot stretches, and progressive strengthening, one can expect reduced pain, improved arch stability, and faster tissue recovery. Consistency, proper intensity selection, and adherence to the warm‑up and cool‑down phases are essential for optimal outcomes.
Readers are encouraged to select the vibration plate that best aligns with their budget, space constraints, and feature preferences, then apply the exercises daily for at least four weeks to assess progress. As always, medical advice should be sought for persistent or severe symptoms.
Products Mentioned in This Guide
Frequently Asked Questions
How often should I use a vibration plate for plantar fasciitis?
Start with 3‑5 minutes per session, 3‑4 times a week, and gradually increase duration as comfort improves.
What are the safest vibration plate settings for foot pain?
Use a low frequency (15‑25 Hz) and low amplitude setting to stimulate circulation without overstressing the arch.
Can vibration plate exercises replace traditional stretching for plantar fasciitis?
They complement but do not fully replace stretching; combine both for optimal flexibility and relief.
Are there any contraindications for using a vibration plate with plantar fasciitis?
Avoid use if you have acute fractures, severe neuropathy, or recent foot surgery without medical clearance.
How long does it typically take to see relief from vibration plate therapy?
Most users notice reduced discomfort within 1‑2 weeks of consistent, proper use.